April 23, 2026
The Package Testing Problem Google Couldn’t Ignore
Passing a vibration test doesn’t mean your product is ready for the real world. See how better visibility leads to smarter, more reliable designs.
In the dynamic landscape of industrial maintenance and reliability, the advent of continuous monitoring has marked a pivotal shift in how we approach machinery health and operational efficiency. Central to this transformation is the groundbreaking integration of Motion Amplification® technology, a tool that has redefined the possibilities of vibration analysis. At the heart of this revolution lies Iris Edge™, a product that embodies the fusion of these cutting-edge advancements. Iris Edge™ not only simplifies the process of vibration analysis but also elevates it to a level where continuous monitoring becomes not just feasible but extraordinarily powerful. This blog post delves into the transformative impact of Iris Edge™, exploring how it harnesses the power of Motion Amplification® to bring unparalleled insights into the health and performance of your machinery.
Jeff Hay: We’re going to be talking about today’s topic. And we’re really excited about today’s topic. We’re really excited about today’s topic. We’re going to be talking about today’s topic. We’re going to be talking about our latest product, the Iris Edge.
And so, personally, this is an evolution in, you know, RDI, and this product really represents some of the journey we’ve been taking towards, you know, pushing Motion Amplification® into the industry and really leveraging camera-based vibration monitoring and now with this product, the Iris Edge and sort of connecting to the IoT world.
This, this, this definitely represents a leap forward for us and, and hopefully for our users as well. As they learn more about this product and what what it can do, do for them. So we’ll get into that here in a couple of minutes.
Just a couple housekeeping things about the the webinar – it will be recorded. It’s being recorded and then you’ll have access to that afterwards.
One thing to note whenever we’re sharing videos during a webinar, sometimes the videos can seem choppy on your end. That’s usually just an issue with the internet speed, but then the nice thing is, that when it goes up to the nice thing is that when it goes up to the cloud it records smoothly they pay playbacks. It records smoothly. They pay playback speedily on our end. So, it records smoothly. They playback smoothly on our end so you you’ll be able to see those videos if you if you want in the recorded video after the webinar is over.
And then the other thing is ask questions. You know, that’s one of the things I really like about these webinars is the ability to sort of interact and get questions answered and so definitely ask questions along the way and then we’ll try to, you know, answer as many of those as possible when we wrap or throughout the presentation.
And then also one other thing I wanted to point out is that just to kind of show you our website, I’ll put that up. Everybody should be able to see that. So on our website, we have a support or a resource page here that you can go and, you know, learn more about what’s going on with the company.
But there’s a webinars page that will show you all the, current webinars that we’re doing and then the upcoming webinars. But then, you know, the the other part of the web web page shows the webinars on demand. So you could actually go through and click these different areas for example and then get past webinars. So this is a great resource to be able to view.
So this is a great resource to be able to view any of the previous webinars and if if there’s something we discuss that really the topic of this webinar is not on that but we mention it.
Often there’s an entire webinar that you can go and you can catch on our on our website. And then also don’t forget to go on our website to sign up for our newsletter. That’s where you can get all the current information, you know, about the about what’s going on in the latest releases on with motion amplification and RDI.
Okay, so with that said, we’ll jump into this presentation. As I mentioned, my name is Jeff Hay, I’m the CEO of RDI technologies.
And just a little bit about myself. My background is in physics and astronomy. So I’ve got, you know, a background also in photography. And, and combined those really in that astronomy research doing lucky imaging. And then that led to some development with being able to measure motion of things and we applied it to bridges and then ultimate machinery and that’s kind of the genesis for RDI and the underpinnings of the motion amplification technology.
And then I’m gonna let Mike, jump in here and, and introduce himself.
Mike Ciocys: Sure. I’m Mike Ciocys. My background is in reliability and conditional monitoring and so I have a strong, 10-plus-years background kind of doing all the kind of traditional methods, machinery, condition monitoring with accelerometers, just field service, technical support background. Which I think, lends itself really well to using cameras to do the same thing. So it’s a kind of understanding traditional means and then also doing vibration analysis, and, and also, collecting motion. Apply videos with the camera. So excited about this product and how it kind of bridges this gap and also really brings forth some really nice features for, for our users.
Jeff Hay: Thanks, Mike. So, just kind of an overview. So we’re gonna, I’ll talk just briefly about motion amplification, a little bit of background, I think we always find that no matter what the topic is for our webinars, there’s always new people.
And so kind of bring some people up to speed and then also while we’re here just mention a few of the latest advancements and capabilities on that front and then we’ll go right into the Irish edge. We’re going to I’ll give an overview of the latest advancements and capabilities on that front, and then we’ll go right into the Iris edge. We’re gonna, I’ll give an overview of the technology, sort of what it’s, what its capabilities and it’s sort of, when the value it brings to the table. And then, Mike will do a live demonstration, show you the edge itself and some of the screens and then how it how it works. And then of course we’ll wrap with some questions.
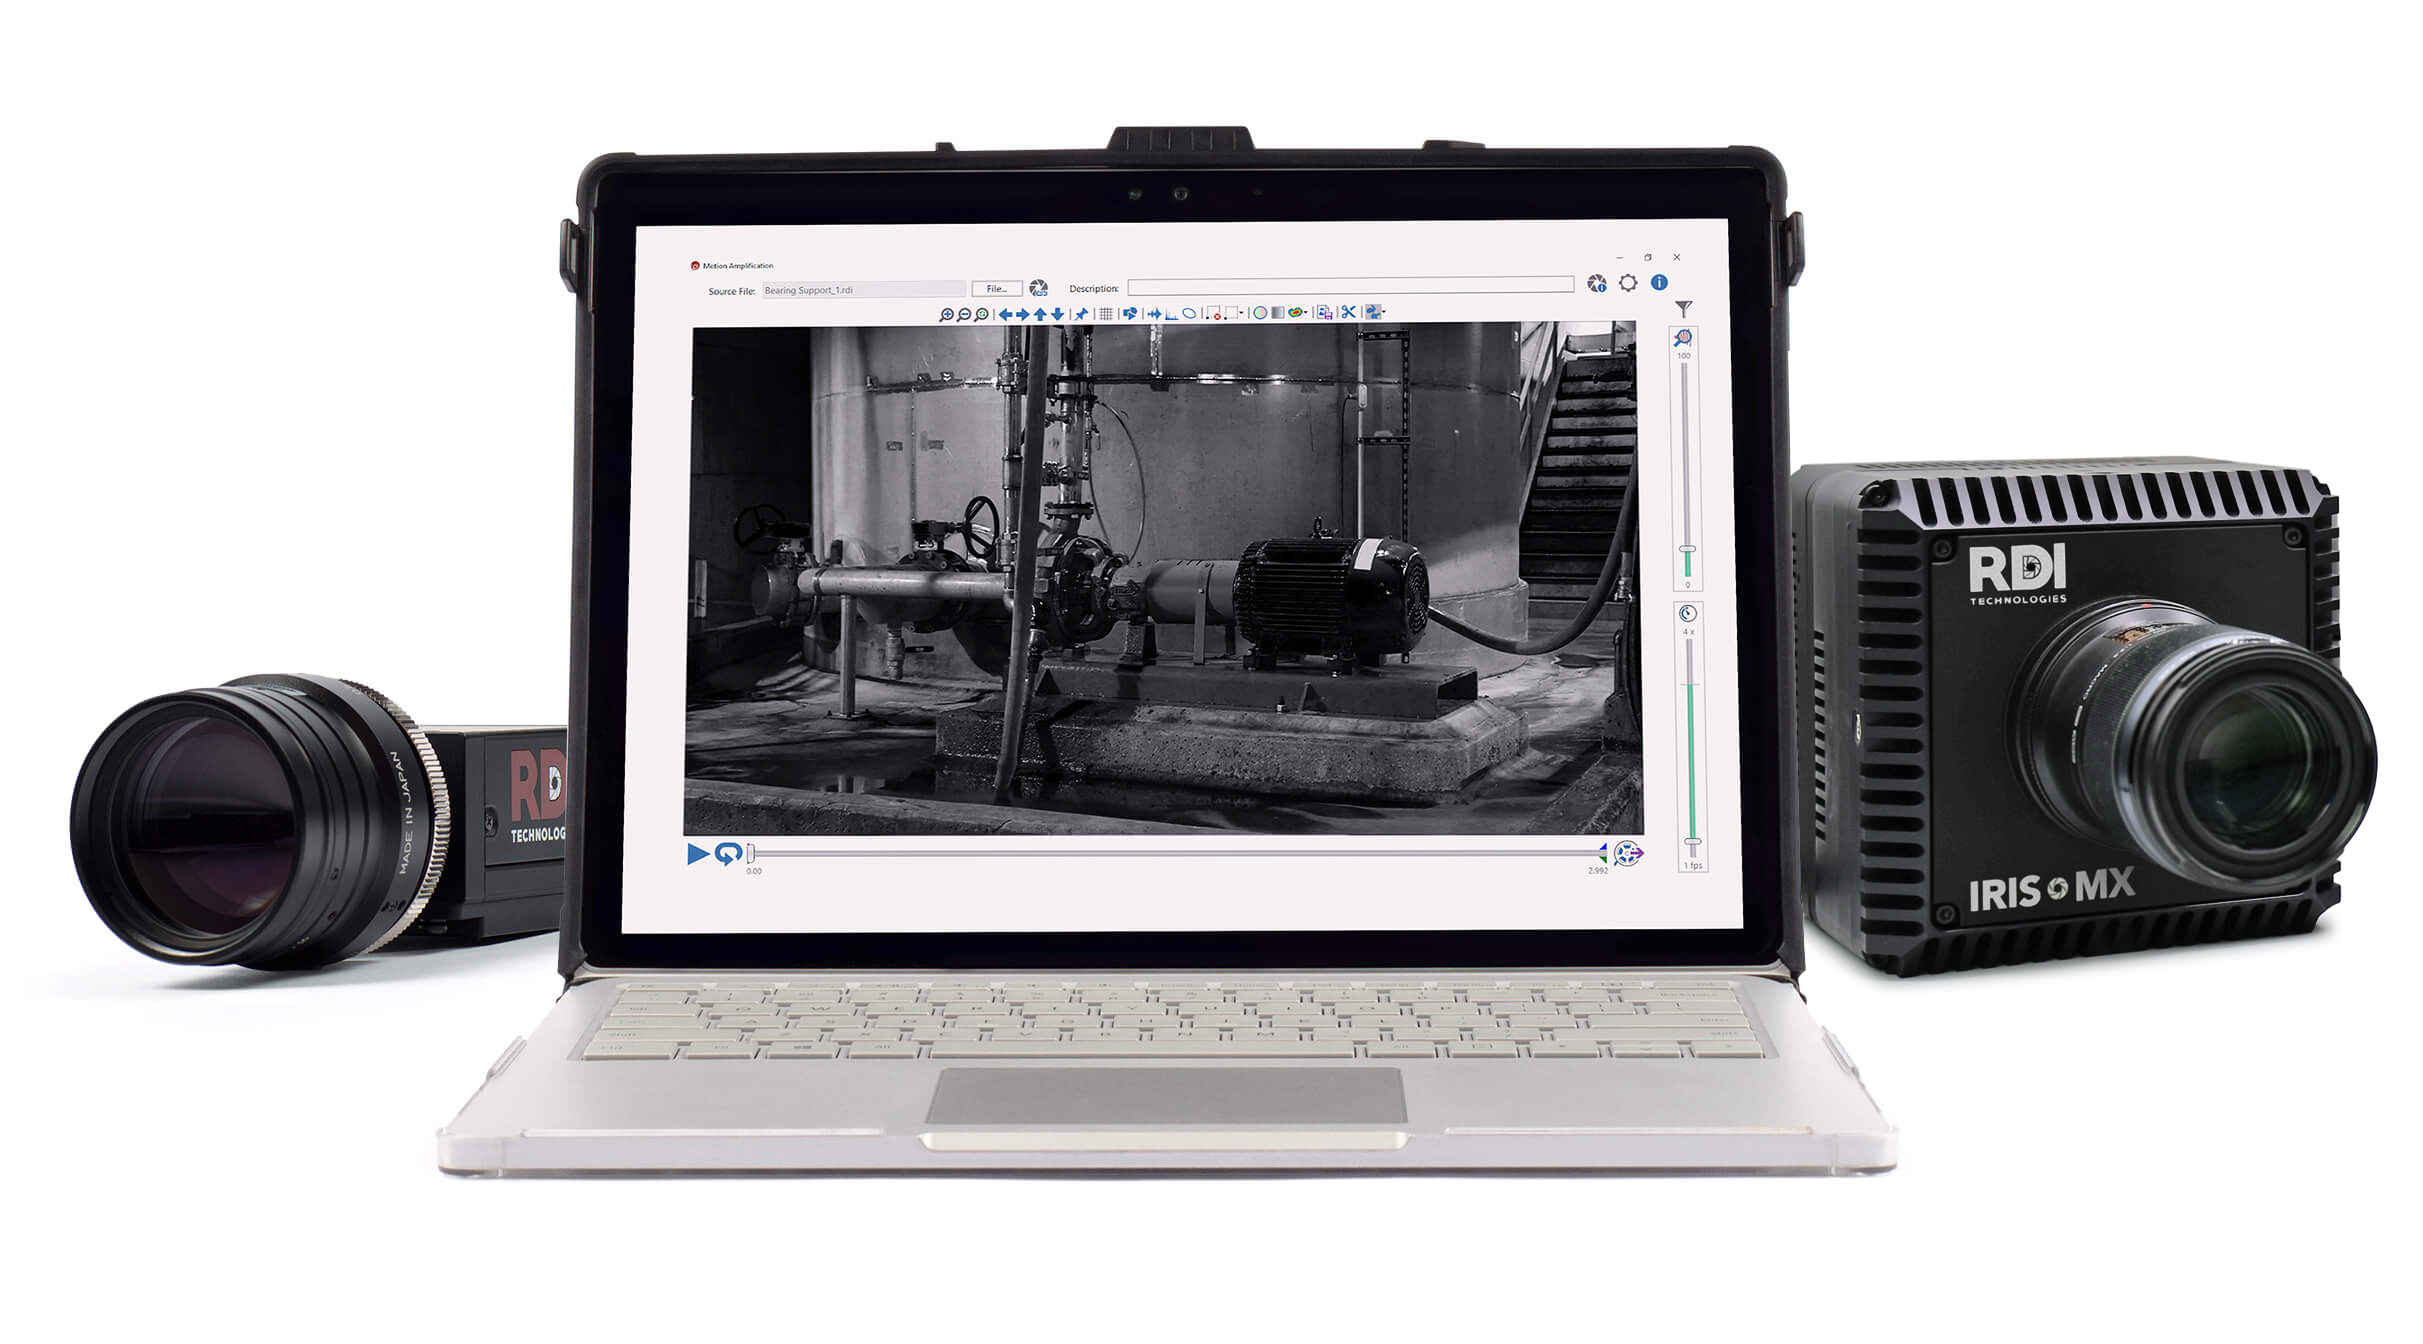
Jeff Hay: Okay, so just a little bit about Motion Amplification®, you know, so camera based vibration monitoring tool that allows you to turn pixels into, sensors. And so, you, each pixel becomes a displacement sensor and now you have millions of displacement sensors to be able to quantify, measure, and visualize motion in the scene.
So this is a motor. Here you can see you wouldn’t go to see that with your eye but motion amplification makes it visible to the eye so that not only can you measure it but you can understand it, which is very important in diagnosing and, machinery faults. You can do that at high speed.
Here you can see a xylophone vibrating at a 1,300 hertz. Or for example, a wine glass vibrating at 786 hertz. So that’s just simply dinging the wine glass. And of course that’s happening over 700 times per second. And, you wouldn’t be able to see that with your eye, but that’s what’s producing the sound in a wine glass. When it when it vibrates in rings and then more applicable to our industry would be using the technology for something like this where you can actually visualize the fault, see the looseness and then correct it instead of having to put a contact sensor on that and being trying to deduce from that 1-point measurement what’s going on.
And that’s going to be a theme that we’ll talk about with the Iris Edge in that measurement and then deduction and then actual resolution of problems, all one step. You can do things like the transient motion where you can measure things, across the scene, not just at a fixed vibration point, but measure the vibration as it moves through the scene and then measure the vibrations that are riding on it.
So this is one area that I think would be very powerful that that we’re excited about for the edge technology in in monitoring robots in that it’s a really flexible deployment option for being able to place these, place these cameras in the robot cells.
So the tech, you know, kind of an overview of the technology. The story here really is, is that graphic on the right-hand side of the screen where you see a plot and you have to deduce what is going on with what is going on with the asset from that one single plot. You know, so high one times could be looseness, could be a balance issue, could be a lot of things.
I think there’s over 20 faults that it could be. But it’s really going to be one of those things and and instead of trying to communicate this tool, communicate this, and instead of trying to communicate this tool, communicate this, this tool, communicate this, this problem to say someone else, communicate this tool, communicate this, this problem to say someone else that maybe not is a vibration expert, you can actually just show them video and you’re on the same page.
You can simply see the fault and know that what you’re fixing is the the true the true problem and in this case one side is going up while the other sets going down, it’s misalignment, but trying to tell somebody it’s misalignment that doesn’t understand that with that plot can be a challenging task to say the least. And, and so as a communication tool and also as a visualization tool. It becomes a very, very valuable way of communicating.
So this is this is kind of interesting and I talk about this with our with our main product, the Iris M™, you know, sort of first product that we, that we launched, this idea of scalability that this becomes even more powerful of a conversation when we talk about the Iris edge because here we can see that by, thinking of the pixels as being, individual sensors. Now you have millions of pixels at your disposal and you can scale up data collection. And what we’ll see with the Irish edge is this gets extended.
Not only do you have one field of view, but you have multiple fields of view that you can you can scale this up so this becomes even more of a value with the Irish edge in the amount of data and the amount of area that you can cover with a single camera. As you scale up your data collection.
Moderator: Quick question, Jeff. Is the motion on the screen exaggerated or is it real-world motion from your video in the previous slide?
Jeff: So all the motion you see is real motion. It is made more visible on the screen. So, but it is, it is definitely the real motion. So there’s no interpolation. There’s no sort of exaggerating certain parts and not others. That’s really just the motion as it would be seen if you could actually see it with your eye.
Moderator: Thank you. We also have a comment from Danny who said it’s okay to say it makes it easy for the folks and operations to understand.
Jeff: Thanks. Okay. Well, I’ll leave that for Danny to say. Yeah, no, I mean, there’s multiple parts of a facility and not everybody’s going to be trained.
Moderator: Thank you.
So some of the technical details…the, you know, we’re measuring displacement this is true this is the Iris M product but it’s also true of the Iris Edge. You know, we can measure down to less than a mil, measure in 3 axis, synchronous across the entire frame. So just some of the things that that the technology can do. And then some of the benefits here are the large fields of view is used as a communication tool. We talked about some of those. But, but really quick, and we’re almost to the Iris Edge, but I just wanted to kind of show the full scope of the capability within the sort of the RDI family.
The Iris CM, the FASTEC cameras, high-speed cameras now, the Iris Explorer with on the Spot robot, the the Modal Amplified. And I wanted to show a couple screens on that that’s the latest product that we’ve that we’ve released before the Edge and be able to do modal analysis.
Jeff Hay: So kind of 2 to that topic, you can now combine an impact hammer with the cameras to be able to do true modal analysis and automatically detect mode shapes. And get the full FRF from the data and be able to pull that out of the data and then immediately be able to visualize this on the screen from an impact. All of this can be done in minutes with our Modal Amplified™ kit. And then of course we can do thermal growth. So this is done over the course of minutes.
And then we also have the the ability to do tach sync where you can actually go through and freeze the motion, the synchronous motion, and eliminate the synchronous and see all the non-synchronous motion. So that shaft is actually rotating at 49 hertz currently and we can actually see the rotational motion that’s occurring as it’s turning.
So flexures in the shaft like this or maybe the fan blades all these things are moving but we frozen it to be able to see. All of the all of the sort of the rotational elements so even here’s a blade off of a of a drone. And then you can actually filter these and see. See the the vibration pattern as it, as it rotates.
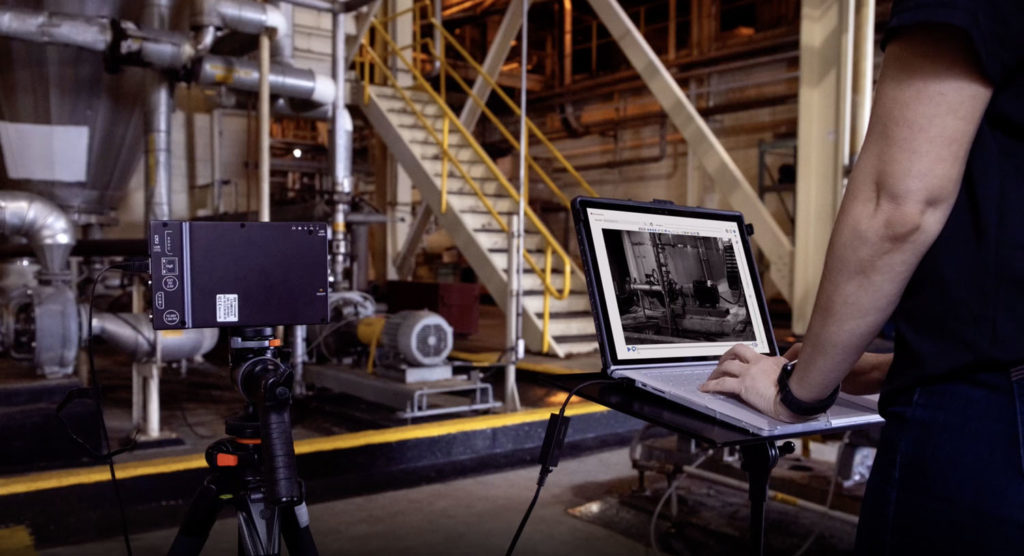
Jeff Hay: Okay, so let’s get into the, let’s get into the Iris, the Iris Edge here. So. Here I will, talk a little bit about it. That’s what it, that’s what it looks like.
You’ve seen it on the original screen. But what is the Iris Edge? Let me talk about a little bit about what it is and and what we’re trying to do with it.
So it is an online continuous monitoring product. It is designed to be ran 24, over 7 and they can do full field camera-based vibrations. So it does all the power of Motion Amplification®. Can’t extract all of the data points. Vibration points out automatically. But what really separates it from say our previous products is it is a true edge computing device. And it really is designed for IoT, an IoT interface. So it really has the capability to monitor trend, alert, diagnose, and troubleshoot all in one single device.
And so I’ll talk about that in a second because that one bullet really is a powerful element that this one device has the ability to do sort of the full the full range of all the way from identifying to diagnosing and troubleshooting. So the data is completely open, and free to integrate, how you like.
Moderator: Hey, quick question, Jeff. Does taxing come with the Iris M™ software?
Jeff Hay: Taching does not. So the tach sync comes with the with the Iris M™ product. So the tach sink is a part of a previous product family.
Moderator: Thank you.
Jeff Hay: Sorry, I lost my video there for a second. Okay, so the, so So the data as I was mentioned, the data is completely open. So that’s this is a really, you know, sort of powerful. Powerful element in that the data can be integrated into your existing system.
It’s open, free for you to do whatever you want. So the data is not tied, it’s not in a closed system, it really these this device is really designed to plug and play with your system and we’ll talk about that.
And then also the easy installation. So we, designed this to have power over ethernet. So single cable delivers data and power. And then of course the pan tilt option, without a focus. So these sort of things combine really make this product very flexible and deployment very easy to integrate and very powerful in what it can deliver in terms of the data and the diagnosis. So let me let me like go into a little bit of detail about each one of these. And then we’ll turn it over to Mike for, for a demonstration.
So let’s talk a little bit about what is edge computing. Because you know we throw these terms around. There’s a lot of buzz words in sort of IoT and data 4.0 and as, we’re sort of moving into that world, but. Edge competing really is a, is, is real. It’s powerful. It’s not just a buzzword. And what it does is it’s the idea that you take a sensor and you place it on the edge of your data. So this would be the Iris Edge, and the key part is that it reduces the data size and complexity from that sensor. So instead of just streaming all of the data, there’s a decision that’s made and a smart decision that’s made to pick and choose what data that you want, what’s important, and only send that data to whatever system that houses your data stores your data or trends your data.
And this does a lot of things. One, it eliminates analysis paralysis. So if you have too much data, it really can overwhelm a system, it can overwhelm a person, and then you end up not doing anything with the data. And so sometimes having more data is not a good thing. And so that’s what Edge devices really do. They they eliminate that but in a smart way and you focus on what only what you need to see and where you need to see it. And this is the point that allows you to really integrate with, you know, other systems and then scale up that data collection.
So now you can you can increase the number of devices really without increasing the large overhead and data because each device is only streaming what is what is necessary. And that’s that’s really what the power of edge computing brings to the table. And so now you combine that with a device like.
But like the Iris Edge and a camera-based vibration and and and you have a lot of power at at your fingertips. So, so let’s talk about that. So the pan tilt option. An autofocus capability.
That’s one of the one of the important parts of the of the value proposition for the Iris Edge because you know as we’ve mentioned before full-field vibration you can measure an entire field of view, but now when you combine this pan-tilt option and the autofocus you can monitor an entire room so every you can imagine it would be you know maybe a hundred different views or 50 different views you can imagine kind of moving the camera around and all the different views that Camera potentially have now is all built into sort of that one cameras capabilities. So entire rooms, entire, you know, areas can be monitored with a single camera. And then all of that data can be monitor, trended, and alerted on. So you can. You, you can do that easily by drawing ROIs and making virtual point measurements.
And just to give you an idea of the the amount of data, you know, this camera. Is capable of streaming about 5 Gigabits per second of data. A single point accelerometer on a device would be streaming about 2, a little round about 2. So we’re talking about 2,500 times more data but because this is an edge device it’s it’s actually picking and choosing so you have the power of having all that data at your fingertips with only selecting what is important out of that data so you can pick and choose.
So it gives you a enormous amount of data to choose from. And and and be able to to monitor and bring back to your to whatever system that that you you want to and we’ll talk about that in a in a minute but you can but kind of going to that full you know sort of full diagnosis trend message that I was talking about earlier, you know, you combine this with Motion Amplification® and you really do have that one step in, you know, sort of one, one stock shop sort of thing with this device.
So, you know, you have the you have the camera that can monitor an asset. It can trigger off a certain range of values and trend that. And then show that the trend is going upwards and then at that point you’re alerted that there’s a change in the behavior. And then you can pull the video out of the data and look at the motion amplification video. And see that the base is loose.
If you remember that first example I showed at the beginning, if we were monitoring that asset, we wouldn’t actually have to go out to that asset. We would have been alerted. We would trend it alerted to it and then watch the video directly from the the data that the the Iris edge is providing.
Moderator: Hey Jeff, we’ve got a few questions that came in. One of them is kind of long. Do you want me to hang on to it until the end or do you want to take it? Okay.
Jeff Hay: Yeah, let’s hang onto it till the end and then yeah, we can just wrap up, wrap up it in that one then. Did you have another one or?
Moderator: Yes, there are a few more. Is this intrinsically safe?
Jeff Hay: No, this device is not intrinsically safe.
Moderator: What is the data storage requirement if it’s recording all the time?
Jeff Hay: Well, the data storage requirement is minimal because you’re actually selectively choosing. What points that that you want to measure so that goes back to the idea of the edge so the, you know, the idea is that you can pick and choose certain waveforms or peak values.
In some cases you may only be trending scalars. Really depends on what you want but the but the reality is you’re not having to pull that whole video stream out with this device.
Moderator: And then last one for right now, are any analytics run at the edge?
Jeff Hay: Yes, so we are we are actually doing. That we can do that trending there. We have a dashboard that will show later so we could do that so so you can do you kind of have a choice if you want to do your own dashboard in your own trending that’s all built in.
You can do that with this device or you can send that device, you can send your data to a different system like Pi historian and you can you can trend it that way.
So it really depends on how you want to do it, but the beauty of it is is the data is yours you can choose if you want to stay within this ecosystem that’s fine.
Moderator: Thank you.
Jeff Hay: Okay, so, so let me just sort of paint this picture for you. A little bit better, with a video, just kind of showing you the, you know, conceptually what, what this, this camera could do. And with the single field of view. So here’s a, here’s a, here’s a bank of, here’s a big of motors that we’re seeing can already kind of see the bad actors in the background.
And so here with a single field of view, you can measure every single one of these, right? And, and this is just not, this is not even considering this thing can pan and tilt in a different direction and look at something, you know, off screen. Or something up high or something in the foreground. But in all of those canays, in all those cases, we’ve extracted the time waveform. The and the frequency spectrum and we could trend. And monitor every single one of these with a single camera. With a single field of view in this case.
Okay, so as I mentioned, you know, this cameras designed to do power over Ethernet. So one single cable, you run this to the the camera and then you simply Melt the camera somewhere, you plug it in. And then data and power are both online and you’re transmitting data back. To whatever system that you choose and the lighting actually is controlled that way too.
So we actually have lighting that you can use in conjunction with this that will automatically turn that the light on at an asset. You could put a light in an asset or by the camera and control this in the software with the same system all you know sort of in one in one location.
Moderator: Another quick question. Do you have to take a measurement from the camera to each point of interest?
Jeff Hay: I’m sorry, can you say that again?
Moderator: Do you have to take a measurement from the camera to each point of interest?
Jeff Hay: Okay. I’m not sure if I understand the, I’m not sure understand. The question, maybe if that person asked maybe let’s say that one to the end and if they want to like just maybe expand on it and then I could answer it at the end.
Moderator: Sure, thank you.
Jeff Hay: Great. Okay. So, so here the idea is that, you know, even in the lighting, also know the lighting power over ethernet as well. So, you know, the simplest, simplistic design of ethernet cabling being able to do this really makes everything easier insert in in terms of installation and the length of run that you can do. And then as I mentioned, the date is yours. You choose how you want to manage this data.
So as I mentioned, and Mike will show this, but we have a dashboard. This is all built in. You know, so in this screen, you can be trending it and alerting, you know, set alarm values. However you want, or you could send it out over MQTT. And we’ll, I’ll talk about MQTT and just a second.
But, but either one, it’s your choice. It’s your data to do with how you see fit, and you can plot waveform spectrum, peak to peak parameter bands, and you know even the camera settings you can send off out via MQTT. If you want to do, do that.
So what, what is MQTT? Well, it’s, it’s a very common format. That is designed for the IoT world that, you know, sort of it’s a standardized format that you can send data over. So you, have these things called, subscribers, brokers and publishers. And the publisher, like the Edge, would send out a send out the information and then, and then the, the broker would manage it and then the subscriber would digest it.
And so this idea is that, you know, facilities, most facilities are set up this way, but you know, even if you’re on MoD bus, there are ways that, you know, with a simple device to transmit to MQTT converted and then send it on to MoD bus. So there’s a whole host of ways to get this out.
But just to give an example, here are some of the ways that that, that we really see this working of CMMS systems, digital twins, pi historian control systems, you know, even AI machine learning, you know, if you take that one topic. We can feed an AI machine learning system with tremendous amount of data. So if you need data, the Edge can provide enormous amounts of it.
So, so this whole world of being able to feed these systems all 3 MQTT is really simple. Once we subscribe to this open standard that we’re publishing too. And then also note that the, the Iris Edge in the CM are compatible with one another. So for example, if you had a CM, you could go online and with it and put an edge on the same system and they see each other. And so the the Iris Edge does the pan/tilt, autofocus capability that you know it’s sort of designed in that fashion.
That’s one unique thing about the IRS Edge, whereas the CM has a lot of triggering involved with like a laser tach and a 4 to 20 input, but a CM can also trigger an Edge. So if one of your input devices on the CM triggers, it can cause the Edge to record or do to take a measure.
And so they work together and you can actually scale up with those as many edges on a system as you want and the same with the CM or mix and mix and mingle them. So I just wanted to point out that the backwards compatibility with with the technology with our Iris CM and product.
Okay, so with that, I’m gonna turn it over to Mike and I’ll let him give you some live demonstrations and and be able to see and you know see the edge and see the, and be able to see and, you know, see the edge and see the, see the edge and see the edge and see the, see the screens and the the edge and see the see the the screens and the the technology
Mike Ciocys: Hey Jeff, I’ll, I’ll steal the screen here when you get a chance.
I wanna thank Jeff for going through all those details. I’m gonna take a kind of a live approach to to seeing how the Edge is working so I have a an Edge camera with me. It’s behind me. I know my screen background is kind of with the RDI logo, but, one of the Edge cameras on our pan tilt mechanism.
Behind me. I’m gonna go through the software and highlight. Some of the key feature sets that the Iris Edge is is bringing to the RDI portfolio. I want to talk about the MQTT first. I think it’s one of the more maybe slightly complicated topics, but it really doesn’t have to be. And and then I can kind of hope to demystify some of that but also then go into the details a little bit for those interested on the webinar.
So for the for the Iris Edge that we have hooked up here. This is my dashboard of diagnostics. So I have an ROI, it’s collecting it on this machine behind me. Never every so often it’s pinging and updating my chart here so you can see I have a trend line working.
I don’t have any thresholds in there right now, but if I had. Essentially a green yellow red kind of alarm lines that could add those into into the system to give me kind of a trend with a threshold level.
I get my, spectrum my frequency spectrum and also my waveform. For those that are perfectly happy with a dashboard like this inside the software, this is native, it’s, it’s, it’s running with the edge and any of the edge cameras that might be set up as well as the CM. This data is presented here. This is also the same data that gets, broadcast over MQTT.
And so to send data in to these other environments. that Jeff was talking about like these AI models, these data lakes, scatter systems, this is all being published by MQTT. And as an example here, I have a program that can kind of essentially say, kind of intercept this packet. And coming from the Edge and so to go into the nitty gritty for a moment we’ll take a look at this.
And there’s 2 things to recognize. This is my Edge camera that I’m connected to and we get 2 packets of data. With the Edge camera every time it publishes some information, one of which is the configuration settings of the camera. And so you get to see. What we’re using, the name, all the settings for the camera, what its IP address is, the different units.
All the nitty gritty about where we drew the ROI and what’s being collected, the distances we entered, all this data about how the cameras actually functioning is part of the MQTT, MQTT packet. And we send that. And you could pull this into your system to help associate or add context or metadata on top of the actual measurement values they’re coming through as well.
This is all human readable, so it’s just a long text string here but you can see shutter properties, all the kind of different settings that the cameras using right now to collect data. And that’s in the config side. We also get an event file. And this is all the measurement data that’s coming from the camera. And so if I kind of scroll up here. Right now, you saw on the dashboard a moment ago I have some waveform. For the x in the y direction I have the spectrum and I also have some peak to peak numbers.
If I scroll through here, I, here’s my waveform information for the x-direction at a frame rate 1 20. And then I can actually go ahead and kind of scroll down here. Here’s my waveform data and it’s just plotted out. In a way that then another system can ingest. And this is the raw waveform. So this would be a great starting points from analytics. And actually do your own calculations externally outside the RDI ecosystem outside the Iris Edge using the MQTT data.
If I scroll through this, you’ll just see that we have the waveform. Quite a long data set. I kind of scroll up here. Here’s the waveform for the Y. I scroll down farther. There’s a there’s a section here for the spectrum. And the waveform peaked the peak. Here’s my scalar number. And this is, this is the data being broadcast automatically from the edge. And Just as a sense of, what this is doing. I’m going to pull up. If it’s gonna let me here.
There you go. I kind of just took one of the values. This value and I can actually trend this and I started this before the meeting. Just to kind of showcase this and you can already see that this system is taking the data points. Coming in from the Edge camera. And just plotting them. And so this is a really simple example of a third-party system taking data from the Iris Edge. And plotting this and then also showcasing it outside of the system.
So this is a really powerful tool. We’ve had a lot of questions about how to export this data, how to get this data into other systems on a more automatic, and, and systematic way and we feel that this is the right solution that really opens up a lot of the functionality. The Iris Edge has this, so does the Iris CM system. And so we, have those that functionality kind of unlocked with the with the update. So, that’s a firmware update as well.
So I have, I’m just gonna hit stop monitoring. So we can take a look at some of the settings. I’m going to open this up. I have just one trigger here. This is the one measurement that, that I have set up and running right now. This is what the Iris Edge is also publishing and what, data it’s collecting. You’ll notice here this looks very, very similar to an Irish CM. We’re using motion monitor to do all the configuration for the IRS edge.
And so those, those of you in the audience here who have an Iris CM, you can control all these systems from the same motion monitor. And, and then all the data is also gonna save in the same Motion Explorer. And so this workflow is very much the same for existing users, but then also we’re adding in the functionality for the Edge.
That really kind of brings in a couple of the key functions here. For one of which is under camera properties. You’ll see this is a pretty standard set of, camera settings. But you’ll notice here you have your ability to control brightness. If my mouse likes me today, there it goes. So you have the ability to control brightness and you also now have a slider to control Focus.
And next these buttons are the ability to automatically adjust brightness. And automatically. Adjust focus. This is the exclusive function. This is an explicit function of the Iris Edge with the electronic lens. Which is really powerful. This is what enables us to pan and tilt the camera and have different items at different distances within focus. It also compensates for different lighting conditions, which allows for more economic behavior. This we have the option here that this can happen every time. So every time the Edge will take a measurement, it’ll check to make sure focus and brightness is good.
But if you were to say looking through a fence or a grate. Or a piece of glass, you could simply uncheck this and lock the focus so that the camera will always stay focused on what you set it up to look at.
2 other features here I want to highlight. Of course, is the pan tilt. So you’ll see here I have some parameters in I have kind of the field of view here set but I can actually come in here I can adjust the camera side to side. I can enter in some manual numbers, 25, eventually. Okay, more this way. I have a full range of motion. Look up, look down. And. Really fine tune the settings for what you’re trying to look at.
You can build another Edge trigger here to take another measurement and those pan tilt settings, those camera settings, those lighting things, everything with those settings could be unique to that. So for each of these different sections of the plant or the section of the factory or or different assets you’re looking at. This is where you could come in here and set those details. And so you can really find tune. How the view looks and then these settings are remembered. And this is where the they are said will come back. To take these measurements every time.
Next one here’s lighting properties. We understand that there’s going to be a lot of circumstances and a lot of different assets that you’re going to look at that. Maybe additional light. And they might not need it all the time. And so there might be occasions where you want a light and you want light on all the time.
Right here I have off to the side of me, I actually have a light. Aimed at this at this machine. I have it coming on every time it takes a measurement. You could also have it only come on when it’s dark enough. For the like to come on and you have some settings here to then choose When should the light come on based on how the room looks? And so you can set this. And in this way, the light will come on as necessary. And it might not come on every time.
But with the light and the auto brightness, it ensures that we’re getting consistent measurements from the Iris Edge, without having to be there with to ensure that the scene looks proper.
The last one I just wanna highlights is with the trigger properties. We have, we’re using the Iris Edge and doing computing on the, at the edge. And so we actually are having the system do some processing for us to control the amount of data, which data we’re getting. How often we get it. And there’s some functions here already built. This is happening inside the Edge camera itself, and controls the type of data and the data flow we’re getting. One of which is setting different, trigger levels And different threshold levels. This way that if The camera takes a measurement and the measurement said is actually in a pretty normal state. It’ll measure it’ll check it’ll publish but it might not take any more data It might not take a video, it might just make an MP4.
This way in in normal circumstances the camera is just maximizing the information you need without getting more information that you might not need at that time. And so you can set different threshold levels. It’s a configure when the camera will take extra data.
You can also then say store only when it is succeeded, all the data all the time. You also the, the option here to publish or not publish, to the data as well the option to send an email if you get a an exceeded threshold And this is to control the amount of data that we’re really producing and to fine tune it.
The next step is you can pick exactly what you’re getting, when this actually collects data. The proprietary format for all our videos is a .rdi file, this is what allows us to open it up in motion. Amplify the video, draw annotations. That would be this recording. When you select this, you’re gonna get a recording, you’re gonna get the scalar data, which is all the MQTT information. And this will save to Motion Explorer to be reviewed. You could say, skip that. I just wanted an MP4 video from the Edge. This way it’s a much smaller condensed video that can be sent. And then saved. And this way you can take a look at it and then actually email it out or send it to colleagues to have review.
We have a function here that will auto-filter to certain high peaks as well. Just to control the amount of data and automate the process further. You could have it take everything, give me the recording, the MP 4, all the scalar data. That’s everything it can possibly do. Or I don’t need any of that video information, I just need the scalar data, And in this case, the camera will, of course I move my pan tilt around here, but. The camera would then collect the information we’re interested in. Send it out as a as an MQTT but also save it in motion, motion explorer, but you would have no video files.
And so It’s a different way of using the system. It could be very advantageous. If you’re just gonna be driving information into some of these AI platforms. But it’s up to you. This is an option that you get to control, in motion monitor. And then, and further kind of brings more utility to the IRS.
I will leave this here. I think Summer, Jeff, I think just quite a few questions we might want to get to.
Jeff Hay: Go for it. Let’s ready when you are.
Moderator: Lots of questions. Thanks for stalking. Great job, by the way. Really informative, I appreciate it. First question here. “In addition to scalars, is it able to pull up a Motion Amplification® footage for any historical transient event or for diagnostic purposes?”
Jeff Hay: I’ll take this. This would be kind of cooked into the setting here. On whether you have, you could have this set up here to say, record all all information, which means that you would have access to the to the .rdi file or an MP4 and you can then use all the same software tools that are enabled for the Iris M, the Iris CM. Every other product that we have and then that would allow to go through and do some advanced post processing analytics.
Moderator: Thank you. Next question is, “We have a camera already. What kind of communication adapter needs to be purchased to communicate via ethernet? And whether the old camera purchased in October 23 can be updated.”
Jeff Hay: So, I think part of that answer is, we’re using the Motion Monitor software to control the Iris Edge. So, if you, if you’re an existing. Are you a customer with RDI, or something? You’ll have this software. You’ll just need an updated version of it from us, for that new communication part to the Iris Edge. The Iris Edge is a new piece of hardware. So if you have a camera from last year.
The Iris Edge is independent of that but in terms of getting this set up with Ethernet and communicating, I in this scenario, this test scenario I have in front of me, I have the Iris Edge.
Powered with power of Ethernet. So I have a power injector. And then I have the cable running into the back of my of my laptop my with running the software so it’s a direct connection but the Iris Edge behaves like any other network device. You can put on a network you can have it on a wireless network if you wanna plug it into a router, you could plug it into a cell modem if you want it to be communicated across. The cellular network. It’s just about configuring a network device and, and where the day is going.
Moderator: On that note, thank you. Is there a way to use a cellular network instead of the internal network?
Jeff Hay: Yeah, we have one of these cameras deployed. Across the cellular network. So you could use a cellular modem. You just have to set the IP addresses appropriately and then, and just plug them in and make sure the cameras got power.
Moderator: Thank you. Next question is the F max, 60 hertz.
Mike Ciocys: Okay, so the F max is directly connected to your frame rate. And so in this case, my sample rate or my frame rate here is 120.
All of the cameras in the RDI portfolio. Behave in the same way that you’re gonna get an fmax that’s half of your frame rates And so running the camera faster will get you a higher fmax. Normally what you do here is then, in order to get the camera, I’m kind of as pegged. From as fast as I can go here. If I want to go faster, get the camera run faster and get a higher F max in my in my vibration data. You can crop the cameras view down. So, right now I’m at 1920 by 1080 for an HT. I just go one step down. It’s going to kind of resize my image here a little bit so that it gets tighter. But now I get the ability to run the camera. Faster. And so now I’m at 2 26. This will put my F. Max at half that so it’s around a hundred 14 Hertz give or take and so you can crop this down further. You can get the camera to go faster still and then that’s where your fmax will be.
So, for the MQTT data that we were looking at before that was being published. At 1 20, the FMX would have been 60 in that case. But with these updated settings, I’d have to come back.
Jeff Hay: Yeah, and so one thing just point out like just as Mike was mentioning, if you view the camera. Sort of as just say a point sensor and you’re gonna treat it that way you can crop you know you can crop really far down and get 6 700 hertz you know sort of F max if you’re just gonna you know sort of crop it in a way that when the camera moves to that location all you’re interested in doing is that one. One spot you can, you can get, a very high up max with the camera and you can mix you can mix it so you could you could move the camera to that location.
Grab a full frame, you know, sort of video at, at the, the higher F max with the, you know, the full video that you want to see and then do a second measurement, you know, kind of independent where you grab that, you crop. So you still have that high F max location, which could be multiple locations. You could do multiple high and then also have the full full frame video to complement that. And tie it back to the same asset in the in the hierarchy.
Mike Ciocys: Yeah. Here’s a quick example already. I crop this down quite a bit tighter I can get the frame rate to go much, much higher. Here you’ll need more light, the camera running faster, but, but you could do just like what you have to say. This could be one of your measurements and another measurement could be the wide angle. At a lower frame, right? As you desire.
And you could, you could independently set the lighting for those 2 measurements. So. So in that case, if you need more lighting for it, you, you could do that, easily.
Moderator: Okay, next question. Can the PTZ be set to cycle through positions?
Mike Ciocys: Yes, you can. So, in this case, I just have the one trigger. You would set this up where you could have multiple different triggers where the cameras going to move to the different positions every time. So you can see here I have a pan tilt. 32 and minus 8. I can come in here and add another trigger. And of course, a little bright, but let’s say that that direction maybe is more. And it’s focusing more on this side. And they it’s looking more at this base in this foot. Now I have a whole bunch of different, these are different, whole different panel parameters. This is brightness up so you can see what we’re looking at. Here we go, drop the game down. So in this. Measurement, this is the field of view, but then if I come back and click on the other trigger, it’s going to reset the camera. And I get my original field of view. And then if I cycle back again. Okay, I can hear the camera moving behind me and then that’s what you feel. So the camera is physically moving to look at the different locations.
Moderator: Thank you. A comment and question. I think what Zack was trying to say was does a distance measurement from the camera to the asset have to be taken to receive accurate vibration data.
Mike Ciocys: Yeah, I’ll take this one too. I mean, I had the camera here, so I have. Just like with the Iris M or the Iris CM. There is a field here to enter the distance to targets. So where you’re kind of taking a measurement from. You would enter this in for the different locations. That the cameras looking, just the same as with the RDI files that you get collected from other cameras. If you find that this number was a little different, you can always change it in the file afterwards, add longer distance pins, but you’ll see that you have a distance here.
Maybe this is now 5.2. And my first one was 4.1. You would enter these distances in to to calibrate the amplitudes.
Moderator: Excellent. So we only have a few more minutes. Do you all wanna continue answering questions or do we wanna?
Jeff Hay: Yeah, we could answer. We can answer another one. Yeah, sure.
Moderator: Okay, the next one is are each of the inspections triggered manually through the software or can it be automatically taken by the software on a periodic basis?
Mike Ciocys: I’ll run I’ll run through that I have the screen open here you set the cycle time for when the measurements will be taken so if I kind of move up the tree there’s an option here for cycle properties.
I had mine running every 2 min. And so it’s gonna cycle through all those measurements. Every 2 min and collect them and you could do every hour, every day, you this is something you could set. And then you’ll be able to see when these were collected. You can kind of see what what some of the stats were as well I stopped just during the webinar. You’ll be able to kind of see what it’s doing and where it is in the process.
Moderator: Thank you. Next question. Does the Edge take distance measurements or is that done manually?
Jeff Hay: That taps into the other question a little bit. That’s. Right now it’s still a manual process.
Moderator: Are there plans to add autofocus to Iris CM?
Jeff Hay: Yeah, we’ll see. I mean, where I think as we advance, we’re always, you know, like for example with this product we added the capability of the the MQTT to the CM. So we always try to as we roll out new product, new capabilities, we try to cross pollinate those features. So, but right now there’s not. You know nothing imminent with that but I do think auto focus is is is a powerful capability and we added where wherever we can.
Moderator: Thank you. As the interface shown default software with Iris Edge or is this part of the Motion Amplification® software pack?
Jeff Hay: This is part of the software pack. So this is Motion Monitor. Which would be the same software that the Iris CM™ has been using for the last couple of years. And so the the Edge is using the same system the Iris CM™ has been using. And it’s, it’s a part of the, of the default software installation.
So it looks like, I guess we’re running right up on, time. So. I’ll just jump in and you know as we as we wrap. Just, you know, thank everybody for joining. I know, how valuable everybody’s time is, you know, so, so taking this time out for, for an hour to join.
So we really appreciate it. And, you know, we’re really excited. You know, this, this, this technology. I think, you know, we’re really invested in really continuing the capability of this technology and you know adding any more and more value to sort of the motion amplification technology and the and so we would you know if you have more questions we would be more than happy to sort of Reach out and answer those or if there’s interest in in seeing learning more about the product don’t feel you know don’t hesitate to directly reach out or we could reach out to you and sort of do it more in-depth demonstration.
I think there’s a lot more capabilities in here that we’re really excited about. And we would we’d be happy to you know sort of teach you more about it. So thanks everybody for joining. I appreciate it.
Want to learn more? For more information or a quote on our products or services, please contact us.