GET IN TOUCH.
Want to learn more? For more information or a quote on our products or services, please contact us.
Connect the bayonet connector of the supplied Tach Cable* to the bottom output connector on the right side of the Laser Tach:

Then, connect the 8-pin end to the GPIO port on the back of the Iris Camera. This connection is the same for both Monochrome and Color cameras.

Turn the Tach on by pressing the large center power button. The display will become active. Press and hold the large Power/Activate Tach button. The "Laser Active" icon will become visible in the display. While holding, press the Menu/Lock button. The lock icon should appear in the display. The laser is now locked on for use.

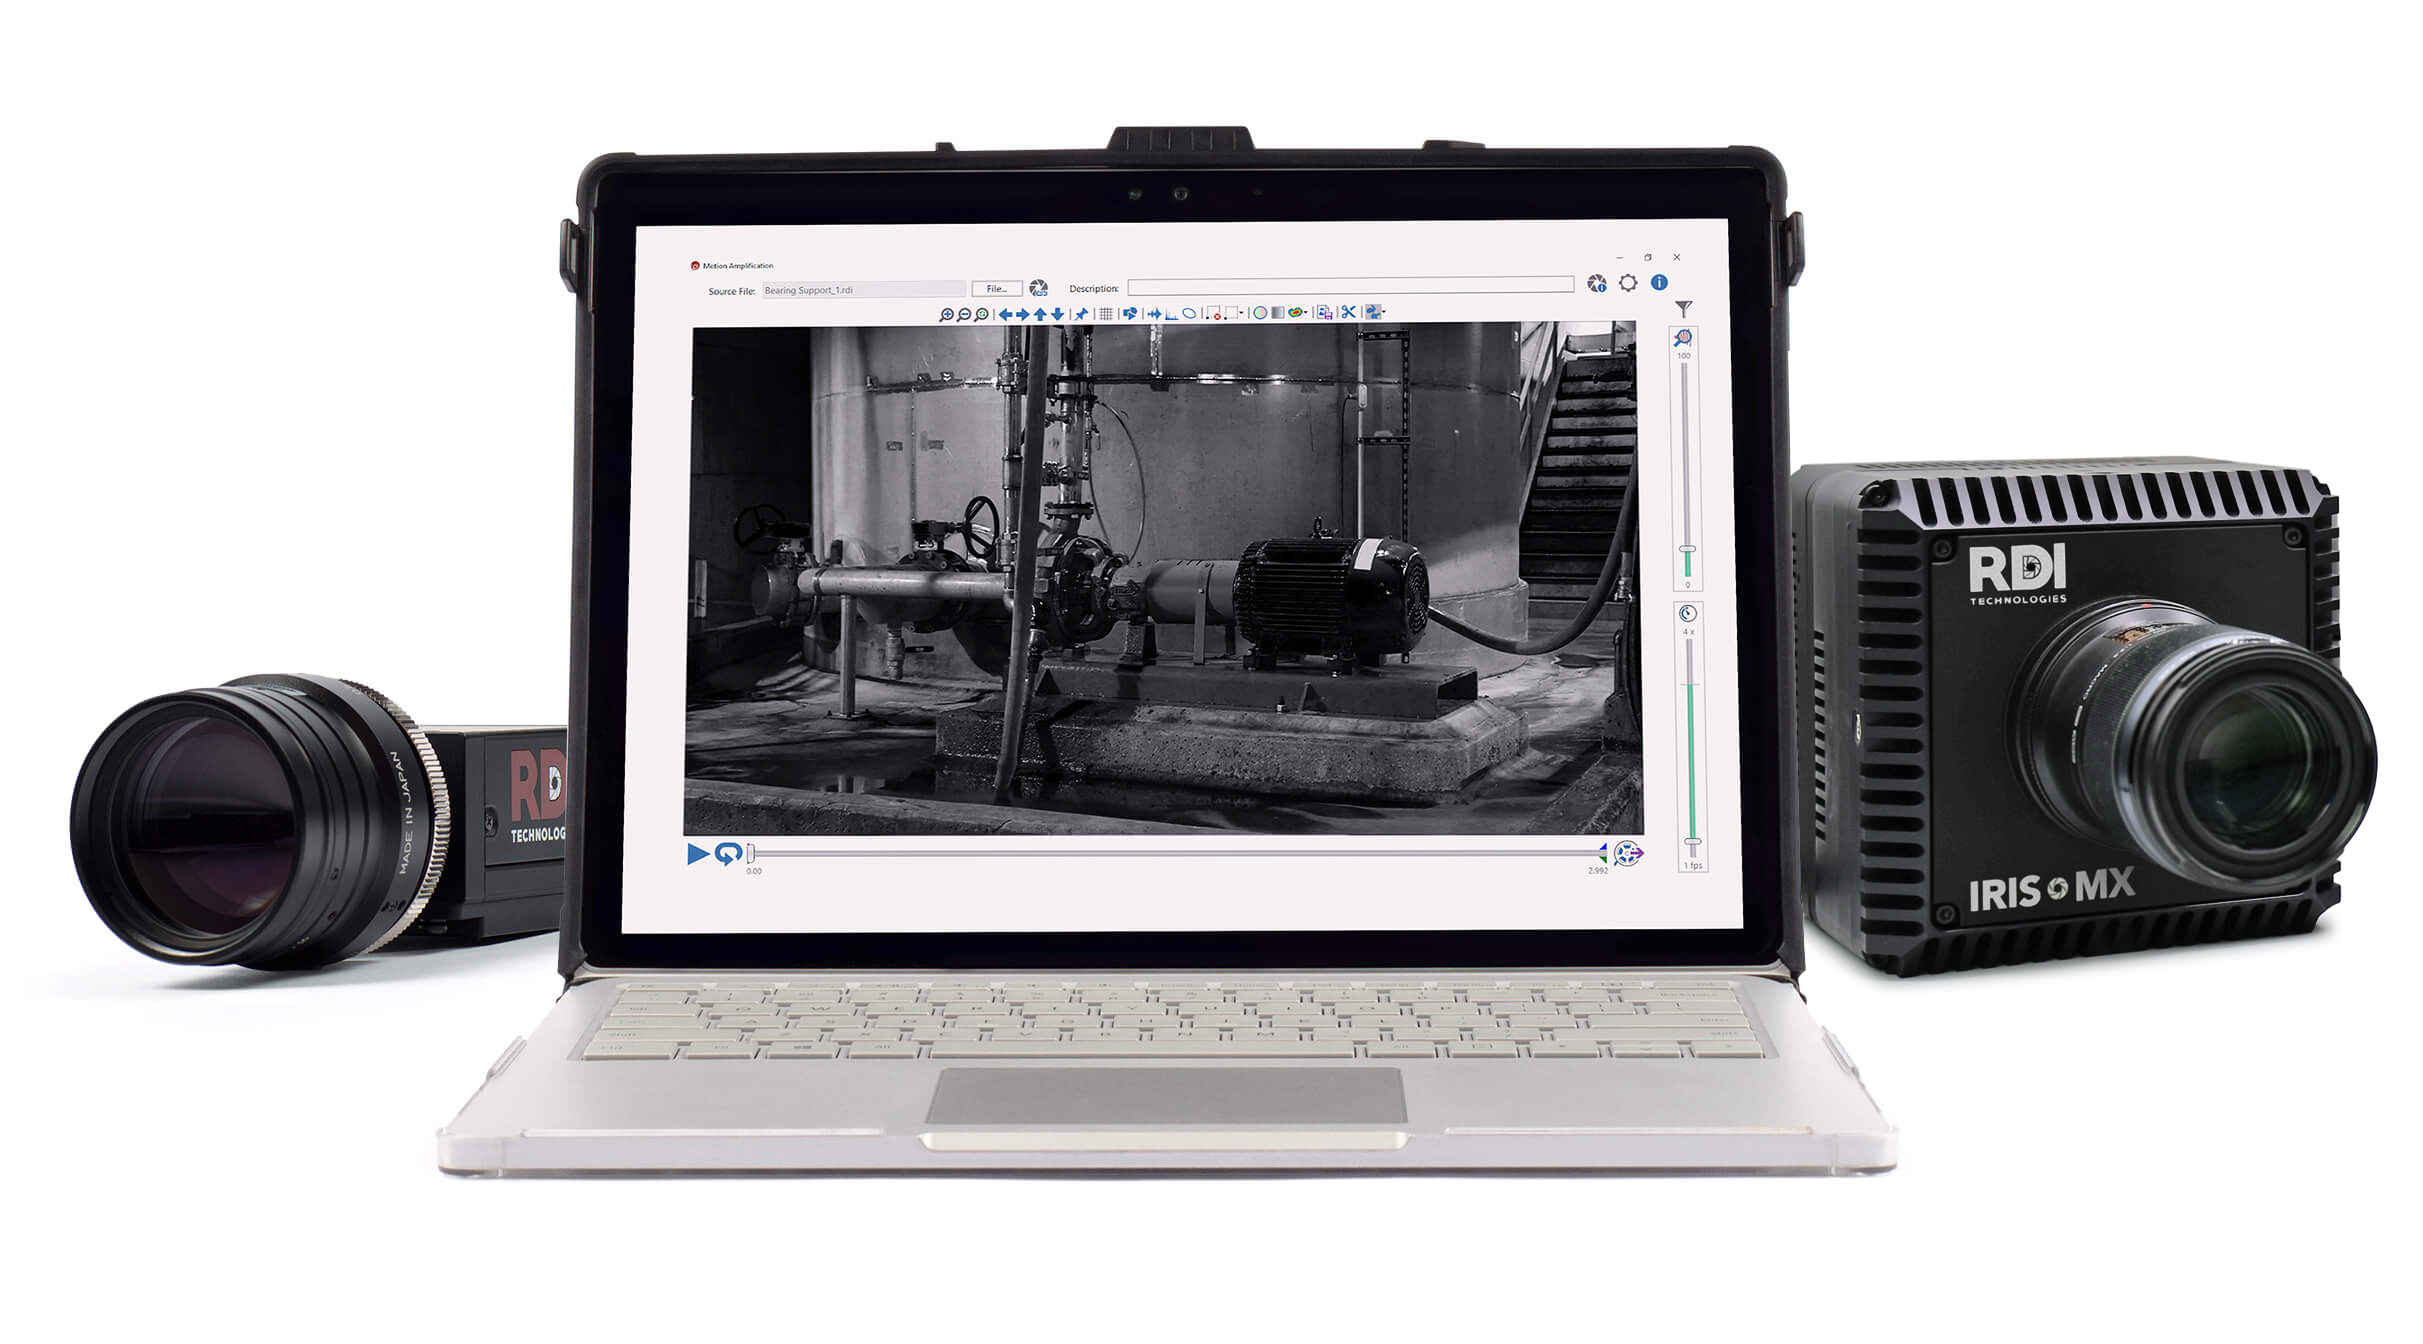
In the software, you will want to set your Brightness down as low as possible to obtain a clearer image. This type of recording will benefit from a large amount of supplemental lighting.
------------------------------------------------------------------------------------------------------------------------------------------
*The hardware for this option is provided by RDI Technologies in the following Kits:
1) Flir/Basler Laser Tach Kit Includes:
2) Flir/Basler Laser Tach Interface Cable Kit includes:
3) Flir/Basler Universal Laser Tach Interface Cable Kit includes:
Do I need to do anything special to use my New Feature for the first time?
There are several “Add-On” features to purchase with your Iris M System. These can include, but are not limited to, the Iris MX, High Speed Plugin, Iris M Tachometer, Iris M Color Camera, Modal Amplified, and Iris Explorer. The process below will be similar for all Newly Licensed Features. Simply confirm the status of the Feature in the list when verifying the software is active.
Please follow the steps below to refresh your license.
Refresh Your License:
With some features, if you have already connected the device to the computer, you may receive an error message similar to the one shown below.
Click OK to close the window and continue following these instructions.

Connect the computer to the internet.
Open Motion Explorer ![]() and click the blue
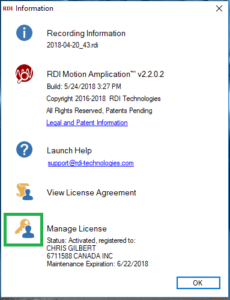
and click the blue ![]() in the top right corner. The “RDI Information” window will pop-up. Click on the ‘Details’ button to display the status of any additional licenses.
in the top right corner. The “RDI Information” window will pop-up. Click on the ‘Details’ button to display the status of any additional licenses.

The License Details window will appear. Note the condition of the New Feature. An active feature will be labeled “True” an inactive one will be labeled “False.” Click the “OK” button to close the License Details window.

Then, click the icon to the left of “Manage License.” Shown in a green box below.

Next, the “Multiple License Management” screen will appear. For all additional licenses except the Iris CM™, click the top “Motion Amplification® License” bubble and then click “OK.”
For the Iris CM, you should first try the Stand Alone Motion Monitor License bottom button. If there is an error, use the top bubble. It is most common to purchase Motion Monitor as a separate feature. If you are unable to determine which type of license you own, please contact [email protected].

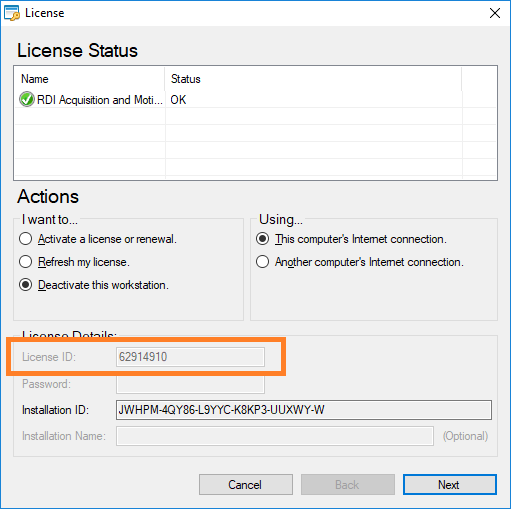
You will now have three actions available to you, please click “Refresh my license,” then click “Next”.

After clicking next, you should receive a pop up that looks like the picture below. Click “Finish” to complete the request.

Close any open RDI Programs.
Open Motion Explorer ![]() and click the blue
and click the blue ![]() in the top right corner. The “RDI Information” window will pop-up. Click on the ‘Details’ button to display the status of any additional licenses.
in the top right corner. The “RDI Information” window will pop-up. Click on the ‘Details’ button to display the status of any additional licenses.

The License Details window will appear. Note the condition of the desired new feature(s) line. Click the “OK” button to close the License Details window.
NOTE – Only options purchased through RDI Technologies will appear as “True.” If you wish to find out more about additional options, please contact RDI Technologies.

Click “OK” again to close the RDI Information window.
The software is now ready to use and will recognize devices connected to the Acquisition Device. The software may display additional fields as necessary for compatibility with the new feature.
20240322
Related Articles:

This video gives you an idea of how the Brightness and Gain sliders interact when taking an External Frame Sync recording: External Frame Sync Brightness vs. Gain settings.


Related Articles:
How do I connect the Laser Tach to the Camera to take an "External Sync" recording?
For External Frame Sync, the minimum synchronized frequency is 5 CPM. This is a limit of the Laser Tach.
For Shaft Inspection the minimum limit is 70 CPM. This is a limit in the RDI Software (due to the camera's minimum framerate).
Want to learn more? For more information or a quote on our products or services, please contact us.