GET IN TOUCH.
Want to learn more? For more information or a quote on our products or services, please contact us.
Please see the attached document for the RDI warranty statement and a list of warranty periods for the hardware in the Iris MX package.
Please contact RDI Technologies™ directly to file a warranty claim using the contact information found here: RDI Technologies™ Support
Successful and efficient downloads from the MX camera require the full capacity of the network hardware on the acquisition computer. It is strongly recommended that both Wi-Fi and Hotspot network detection be disabled during acquisition. (By the way, this will also help the battery last longer.)
If your data transfer is extremely slow or you receive errors like:
Excessive download error. Transfer is beings significantly slowed due to data errors. Do you want to continue?
An unrecoverable download failure has occurred. Please contact RDI customer support.
These are signs that the ethernet connection is being used by multiple processes.
To correct this, follow these instructions:


You should also consider disabling or white-listing the RDI Acquisition application in any firewall settings.
The attached video shows these steps.
Related Articles:
Do I need to do anything special to use my Iris MX™ camera for the first time?
Possibly.
If you purchased your Iris MX at the same time as the complete Iris M™ system, these steps were done before the system shipped. If you purchased the Iris MX later, there are a few settings that need to be confirmed on your computer.
The first is that your license supports the Iris MX, second is that “Jumbo Packets” are enabled, and third is that the connection can pass through the firewall.
Please follow the steps below to confirm, and change as necessary, these settings.
Refresh Your License:
If you have already connected your camera to the computer with the ethernet cable and adapter, you may receive the error message shown below.
Click OK to close the window and continue following these instructions.

Insure you have a connection to the internet.


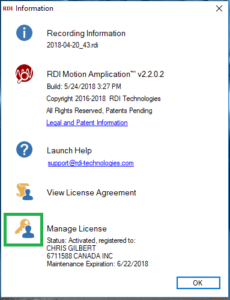
Open Motion Explorer and click the blue in the top right corner. The “RDI Information” window will pop-up, click the icon to the left of “Manage License.”

From the Multiple License Management window, select the “Motion Amplification License” bubble and click OK.
NOTE- “Stand Alone Motion Monitor License” should only be selected for use in conjunction with the Iris CM.

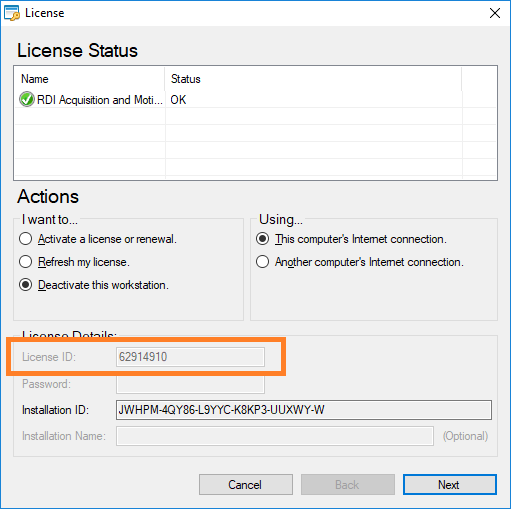
You will now have three actions available to you, please click “Refresh my license,” then click “Next”.

After clicking next, you should briefly see a “Processing” pop up that looks like the picture below.

After the license is processed, you should see the “Request Completed” screen shown below. Click “Finish” to complete the request.

Close the RDI Information window by clicking “OK.”

Verify that the Iris MX™ software is active by following these steps.
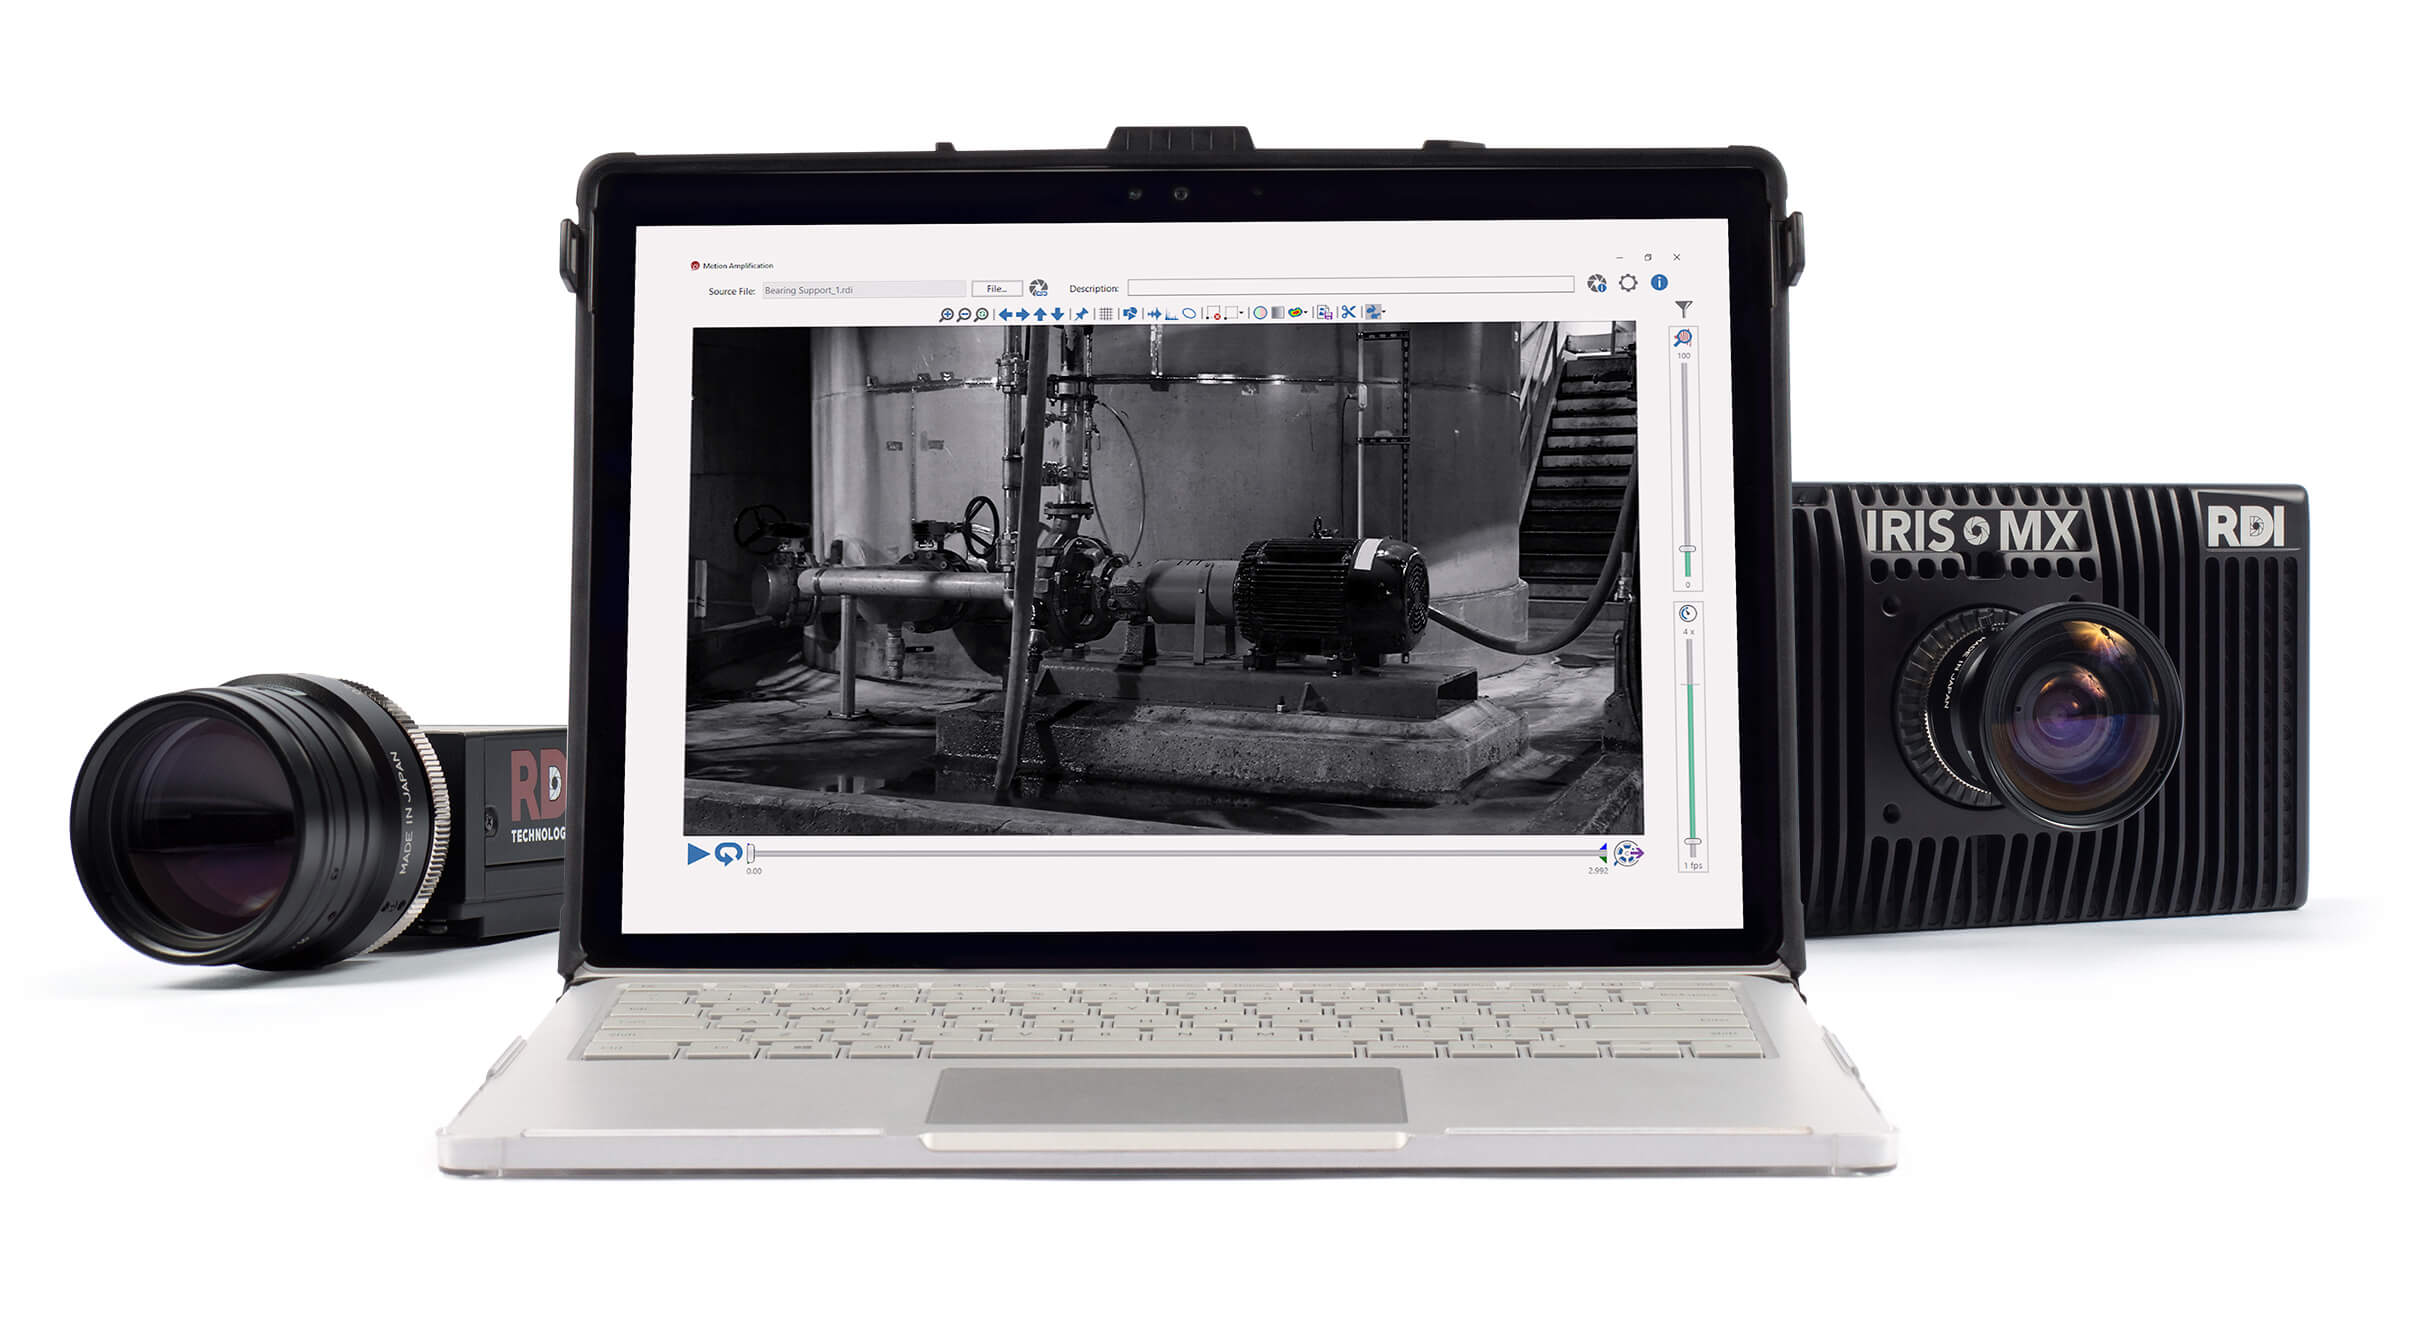
Close Motion Explorer, connect the camera, and open RDI Acquisition using this icon  . You should see these indicators that the software has detected an Iris MX camera.
You should see a red power button in the upper right-hand corner of the window.

Under “Camera Properties”, the framerate should show 120 fps and be about midway on the slider.

The “Image Properties” should show the Width and Height settings shown below.

You can also click the blue  in the top right corner. The “RDI Information” window will pop-up, click the icon to the left of “Manage License.”
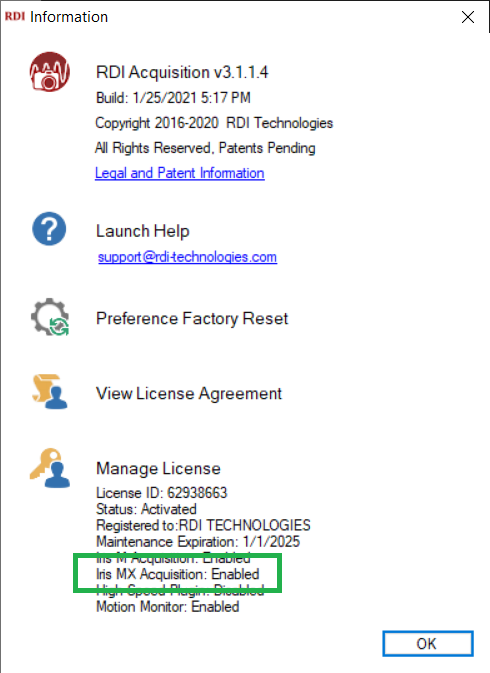
Click OK to close the window.
Enable Jumbo Packets/Frames:
If you have already connected your camera to the computer with the Ethernet cable and adapter, you may receive the error message shown below. Click OK to close the window and continue following these instructions.

Make sure that the Ethernet adapter is plugged into one of the USB ports on the computer.
Type “network” into the Cortana Search Bar on the bottom left-hand corner of the Taskbar

From the list, double-click on the “Network status” setting the “Network Status” window will appear. Click on the “Change adapter options” link from the middle of the page.

Right-click on the “Ethernet X” connection and select “Properties” from the new pop-up menu. Each Ethernet adapter will be assigned a number. Determine the specific number of the adapter that correlates to the one used with your Iris MX™ camera.

In the Ethernet X Properties window, while the “Client for Microsoft Networks” line is highlighted, click on the “Configure” button.

In the “Realtek USB GbE Family Controller Properties” window, click on the “Advanced” tab. From the left hand “Property” list, select “Jumbo Frame.” If the “Value” field on the right says anything but “9KB MTU” use the drop-down list to select “9KB MTU” and then click the “OK” button to save the changes close the window.

Depending on your version of Windows, the above screen may show the selections below. Select the 9014 Bytes line as shown below.

Close any remaining windows and continue as below.
Firewall Settings:
In the Cortana Search window in the bottom left-hand corner of the Taskbar, type “firewall”

Select “Check firewall status” from the list of items displayed and the “Windows Defender Firewall” window will appear. In the list on the left, select “Advanced Settings” to display the “Windows Defender Firewall with Advanced Security” window.

In the left-hand column, select “Inbound Rules” to display a new list.

Scroll down until you see “RDI_Acquisition”
NOTE – This list is alphabetical but with two different groupings. The RDI_Acquisition will typically appear in the top group but check both as needed.
Double-click on the top RDI_Acquisition line in the list to display the “RDI_Acquisition Properties” window.

When you see this window click the “Advanced” tab.

On the “Advanced” tab, make sure that all three of the top “Profiles” boxes are checked.

Click OK to close this window and repeat for the second listing of “RDI_Acquisition”
When you are finished, the entries should look like those shown below. Each entry in the list for “RDI_Acquisition” should say “Profile – All” and “Enabled – Yes”.

Close any open windows. Your computer is ready to use with the new Iris MX™ camera.
These instructions are duplicated in the attachment which is downloadable.
Related Articles:
Want to learn more? For more information or a quote on our products or services, please contact us.